
This guide will show you how to install, configure, and use InsertKit's voice typing and AI features. Let's look at the steps:
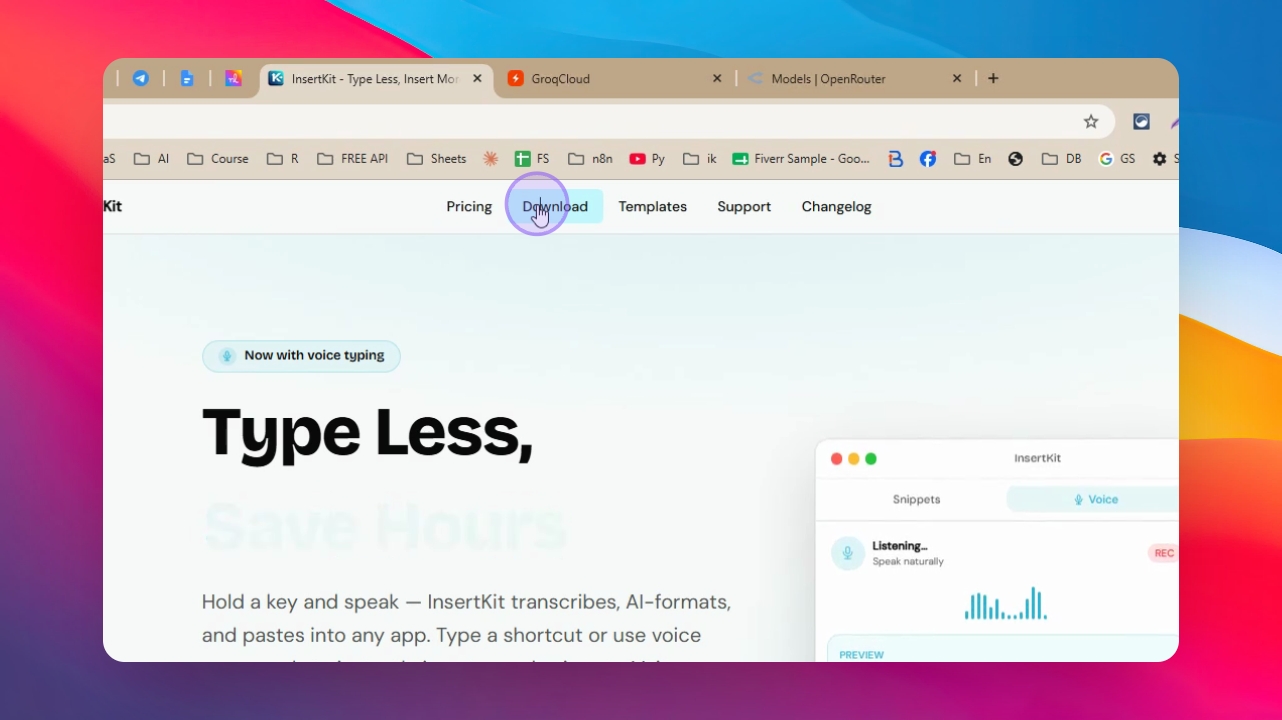
Step 1: Download InsertKit
Go to insertkit.com, navigate to the Download section, and download the application for your operating system (e.g., Windows).
Step 2: Install and Open InsertKit
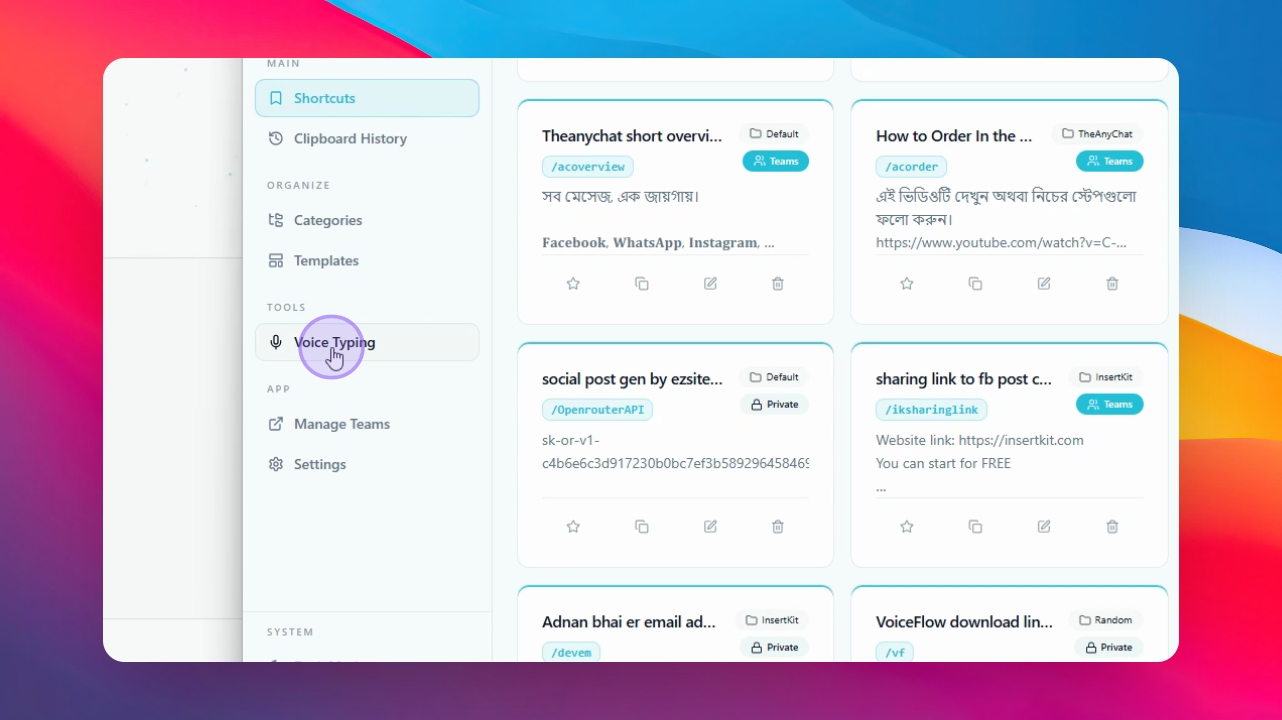
Install the downloaded application. After installation, open the InsertKit app and log in to your account. You will see the main interface displaying your snippets.

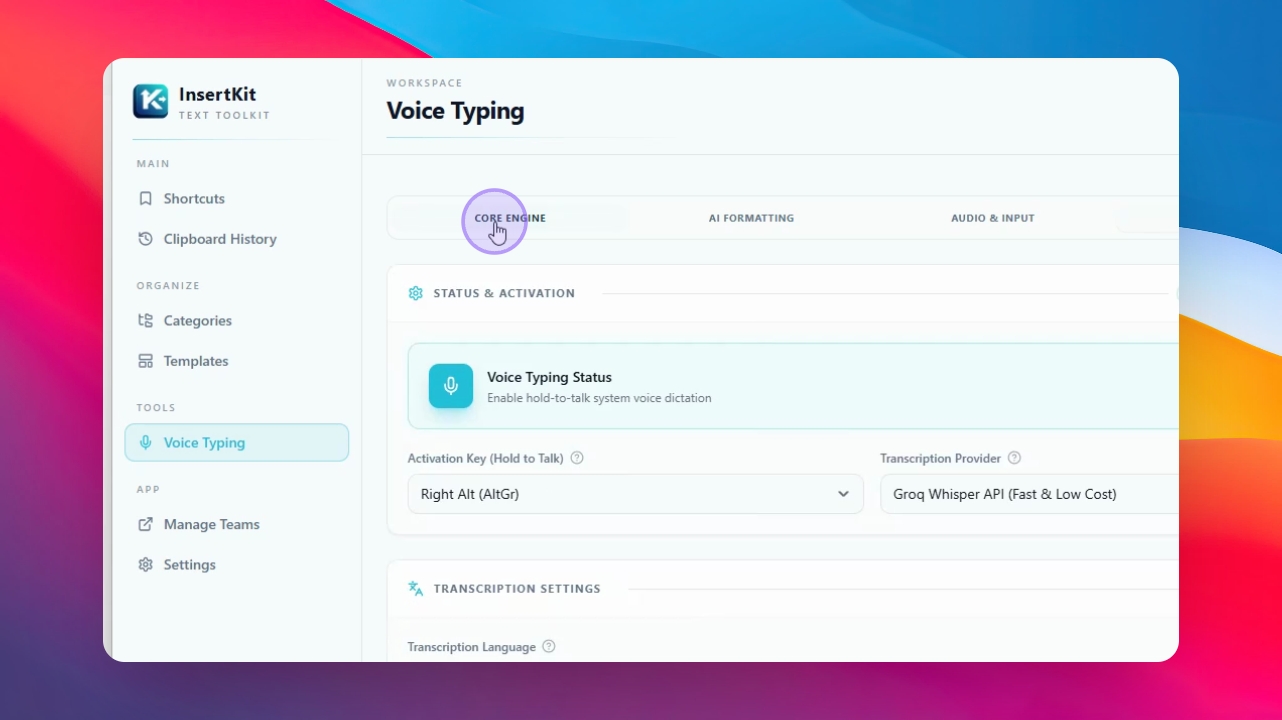
Step 3: Go to Voice Typing Section
Navigate to the Voice Typing section. Here, you can configure the core engine, select your shortcut key for speaking, and choose your transcription model.
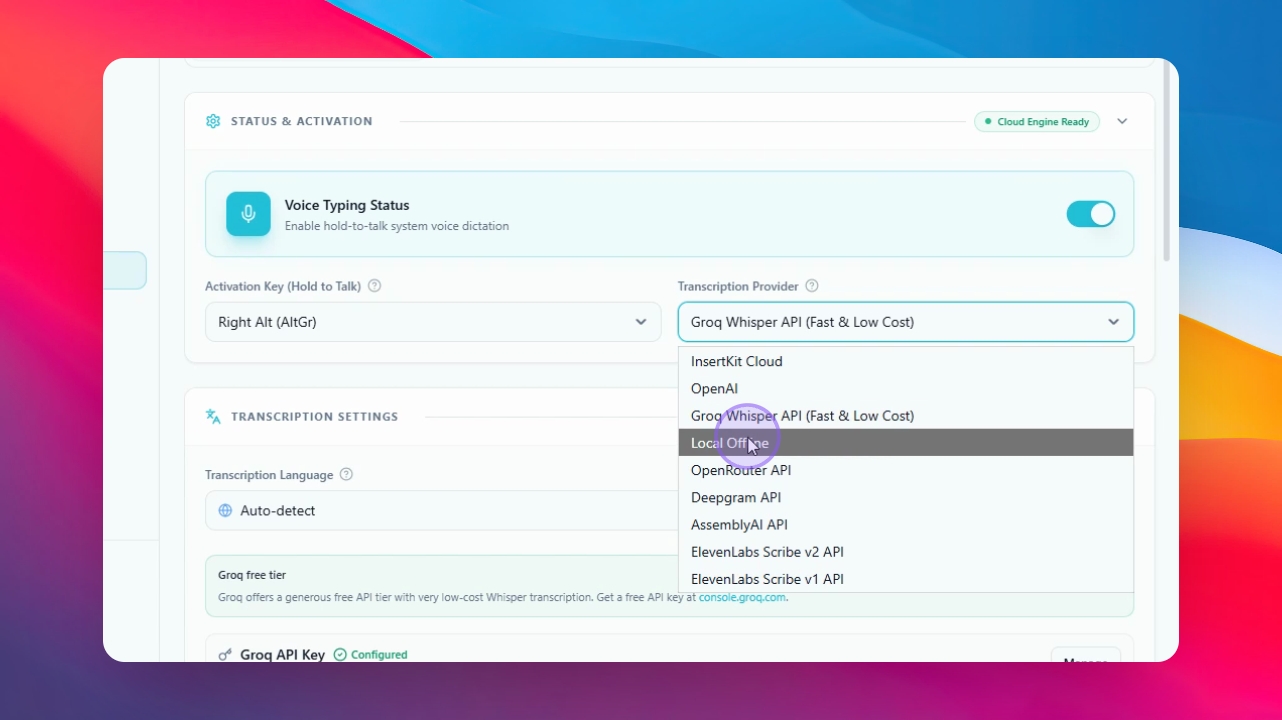
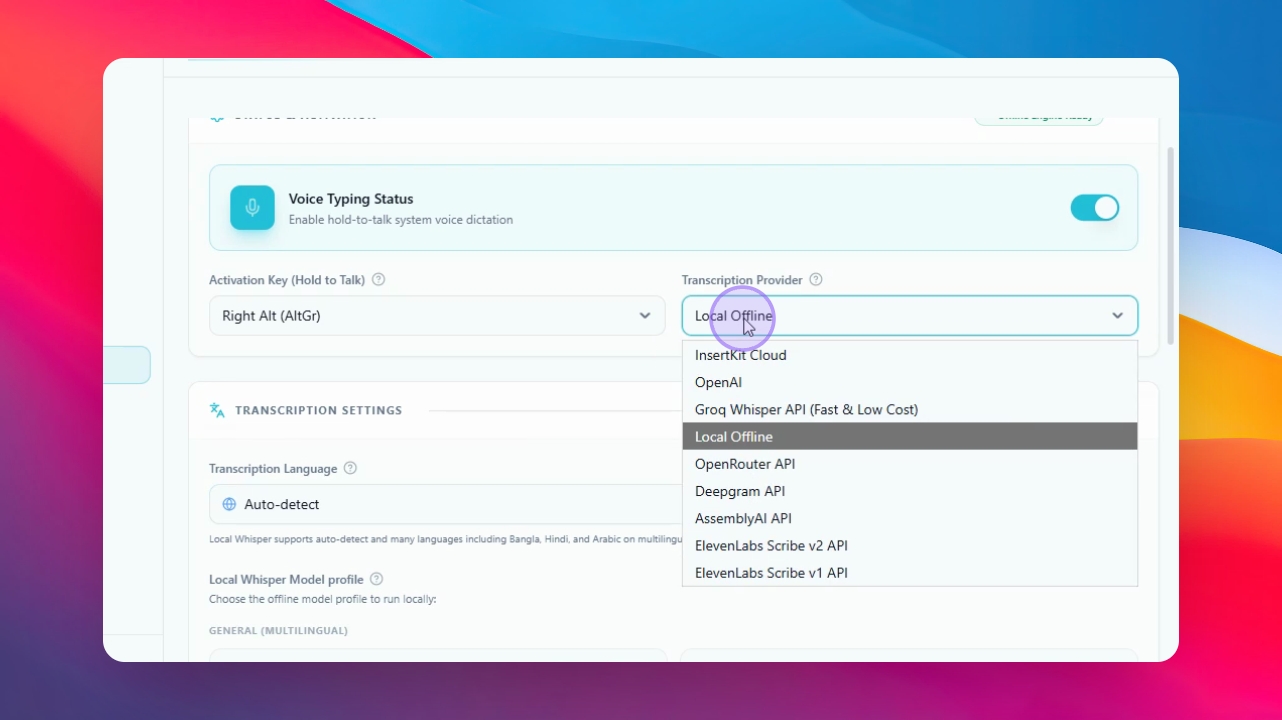
Step 4: Select Transcription Model and Language
Choose a transcription model. Grok Whisper is recommended for being free and fast, but you can also select a local model if preferred. Select your language or set it to auto if you speak multiple languages. For best accuracy, select your main language if you only use one.
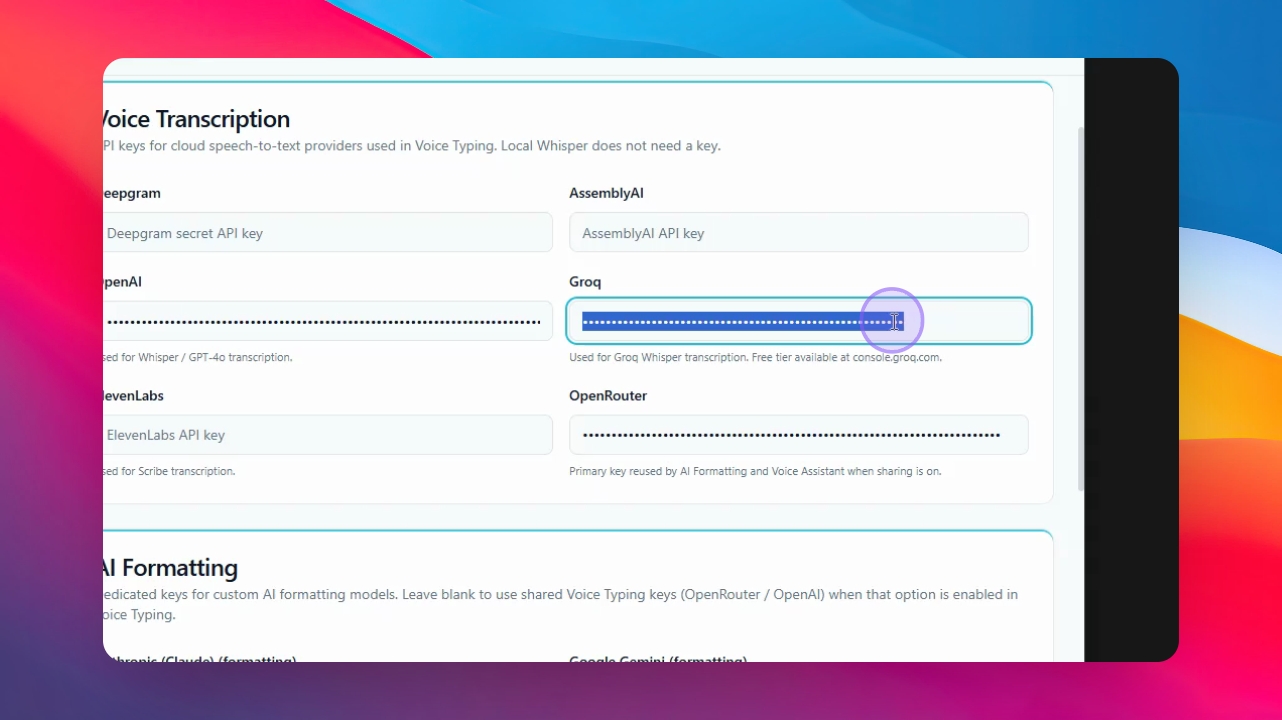
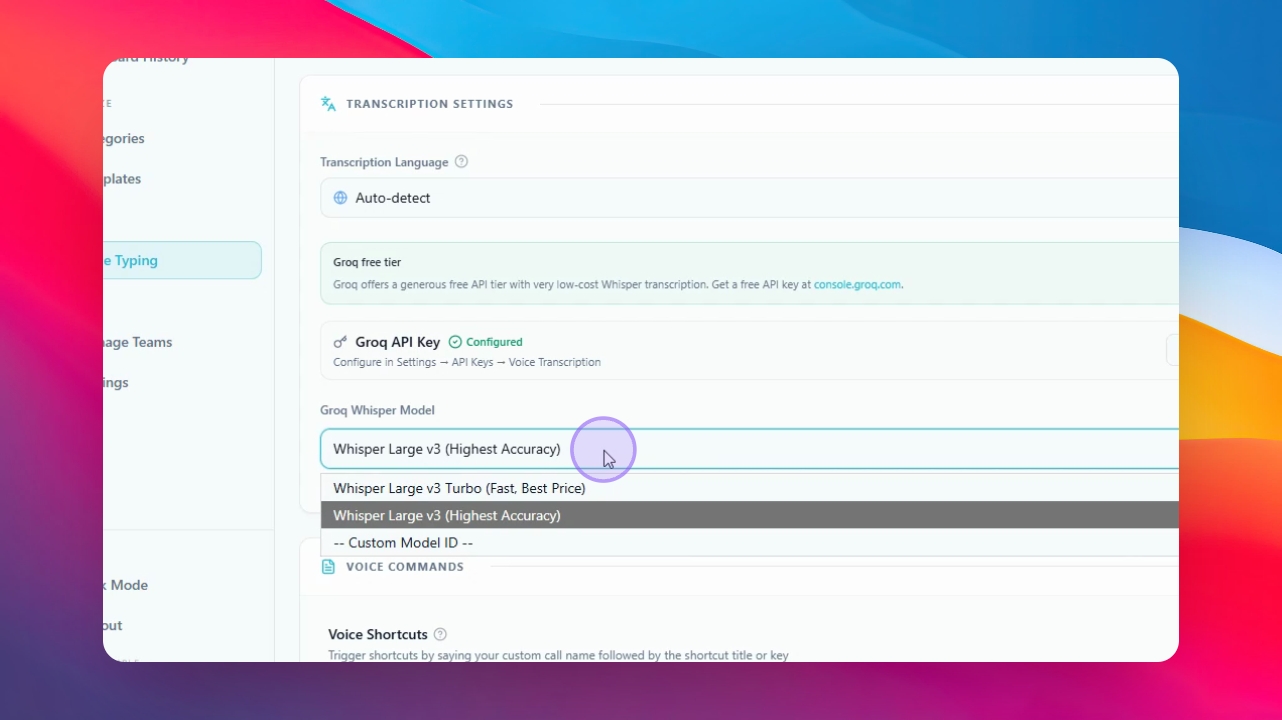
Step 5: Set Up Groq API Key
To use Groq, go to Settings in InsertKit, find API Keys, and enter your API key for voice transcription. To get a Groq API key, visit console.groq.com, create an account, go to the API key section, create and name a new API key, then copy it and paste it into InsertKit.
Step 6: Add Other API Providers (Optional)
You can also add API keys for other providers like OpenAI, Deepgram, OpenRouter, or Living Labs if you wish. For AI formatting, it's recommended to use a provider's API key for better results.
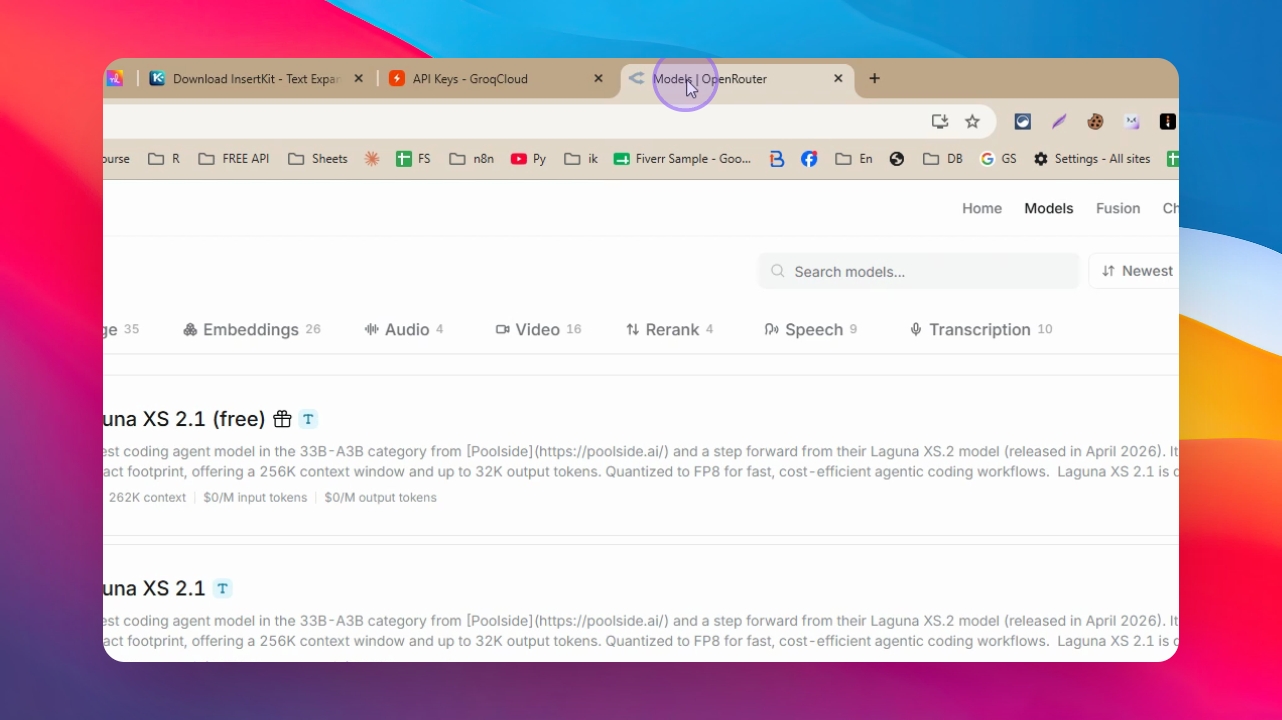
Step 7: Set Up OpenRouter API Key (Optional)
To use OpenRouter, go to openrouter.ai, create an account, add credits if needed, go to your profile, create a new API key, copy it, and paste it into InsertKit. You can use the same API key for both voice assistant and voice typing features.
Step 8: Choose and Configure Transcription Model
Once your API is configured, select your preferred transcription model. Groq offers two models: Whisper Lars V3 for less common languages and Whisper Lars V3 Turbo for popular languages like English. Switch models if you need better results for your language.
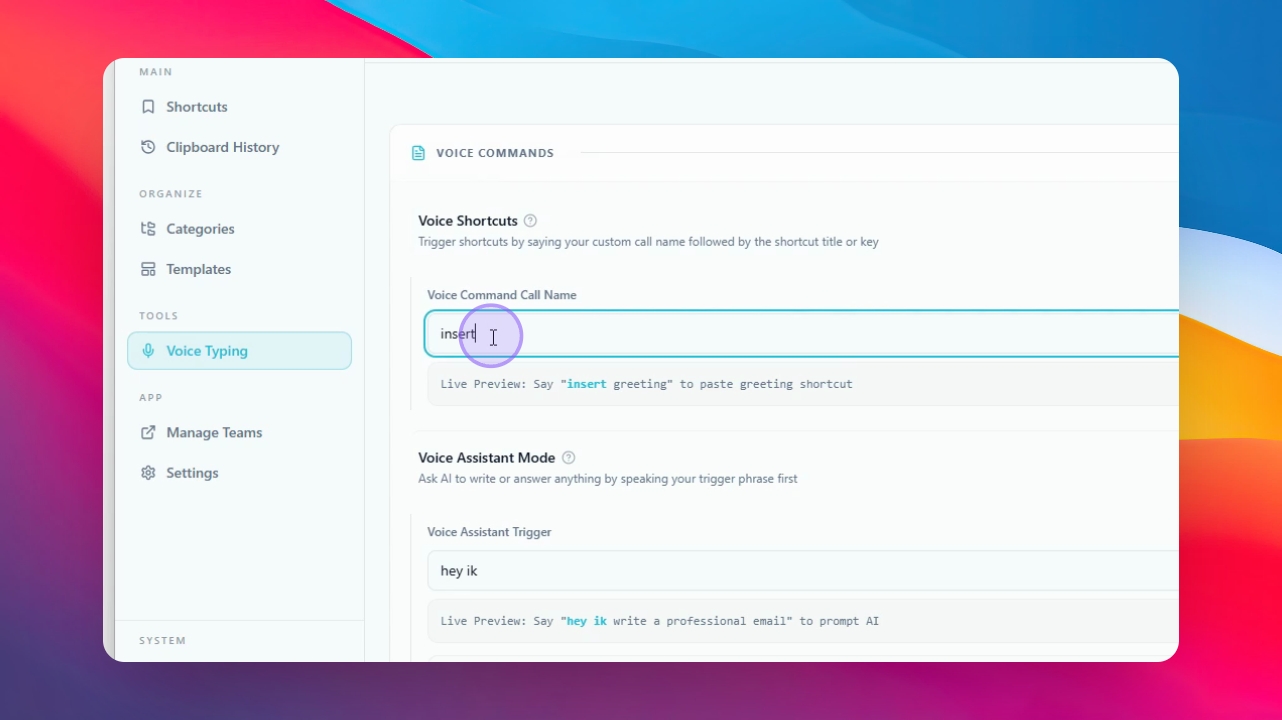
Step 9: Use Voice Command Feature
In the Voice Command section, set up shortcuts to insert snippets by voice. Hold your shortcut key (e.g., right Alt) and say the command, then the shortcut title (e.g., 'insert follow up message'). The corresponding snippet will be inserted immediately.
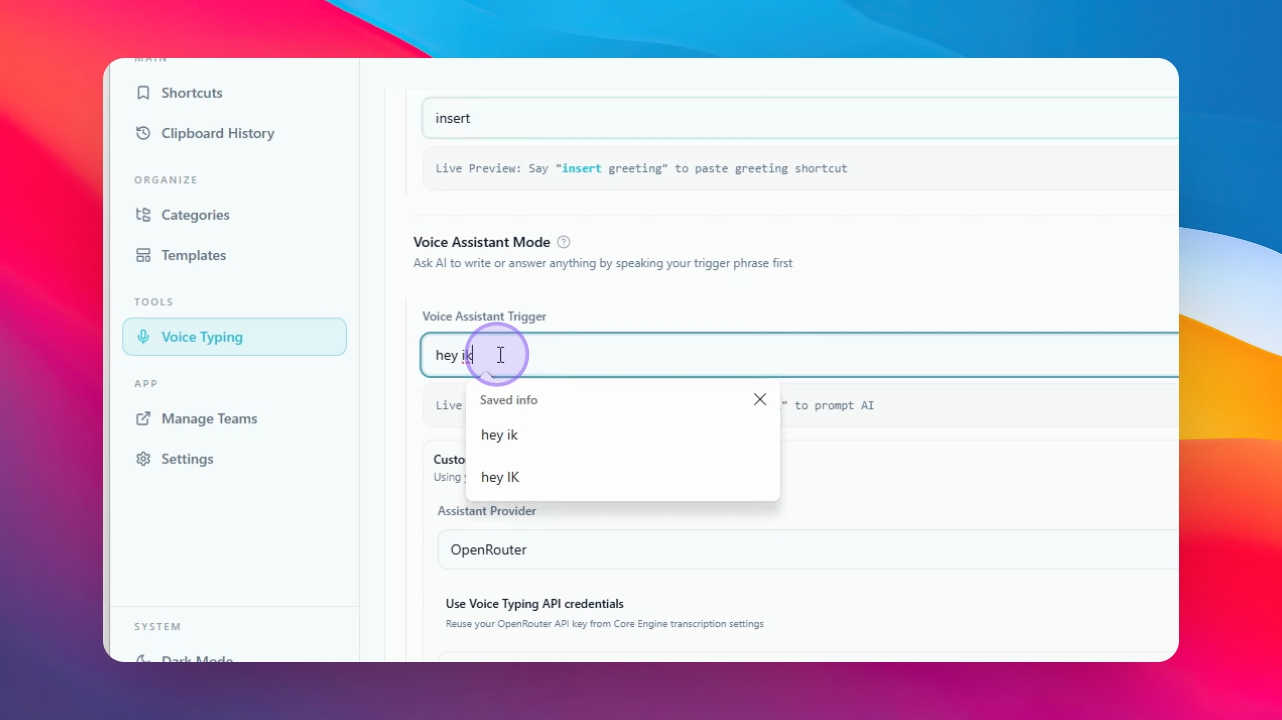
Step 10: Use Voice Assistant Feature
Voice Assistant allows you to give prompts and receive AI-generated responses. You can select your provider and AI model for better results. For example, say 'Hey Ik, write a professional email' or 'Write a social media post.' The AI will generate and insert the content directly into your text box.
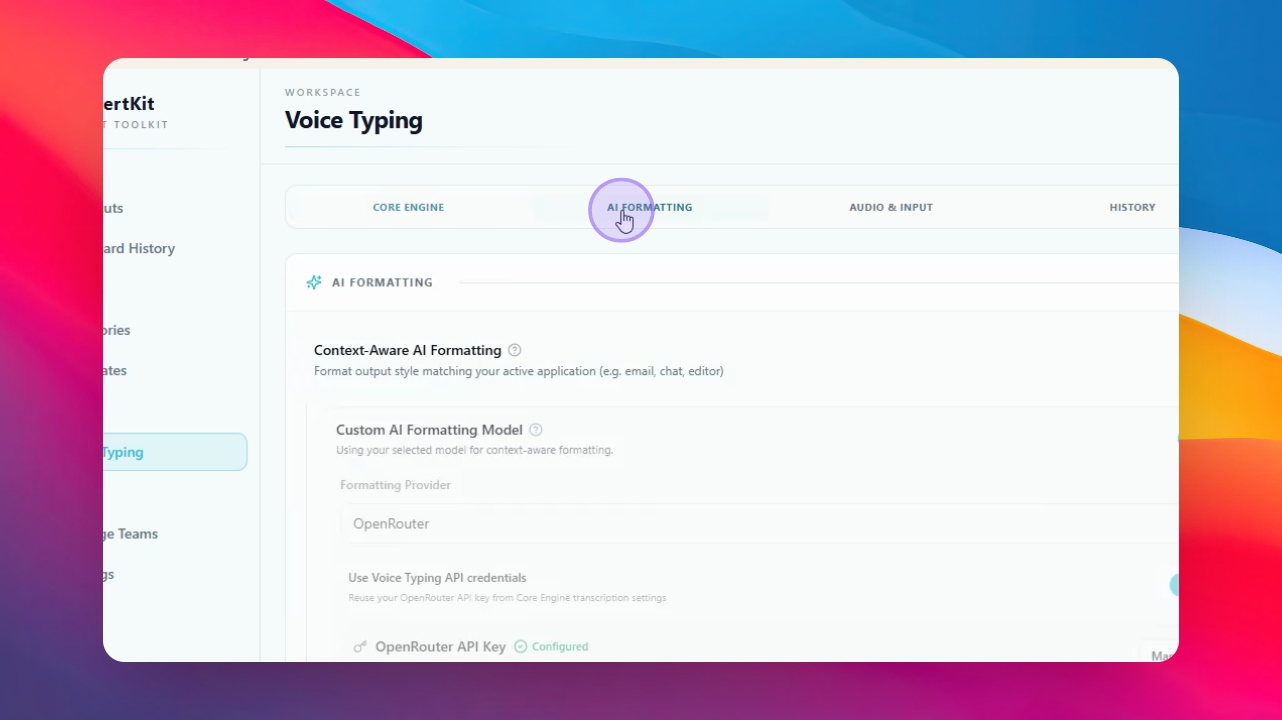
Step 11: Enable and Customize AI Formatting
Enable the AI Formatting feature, select a custom model or provider, and optionally add a custom formatting prompt to improve the output of voice typing. You can also change the prompt for voice typing output.
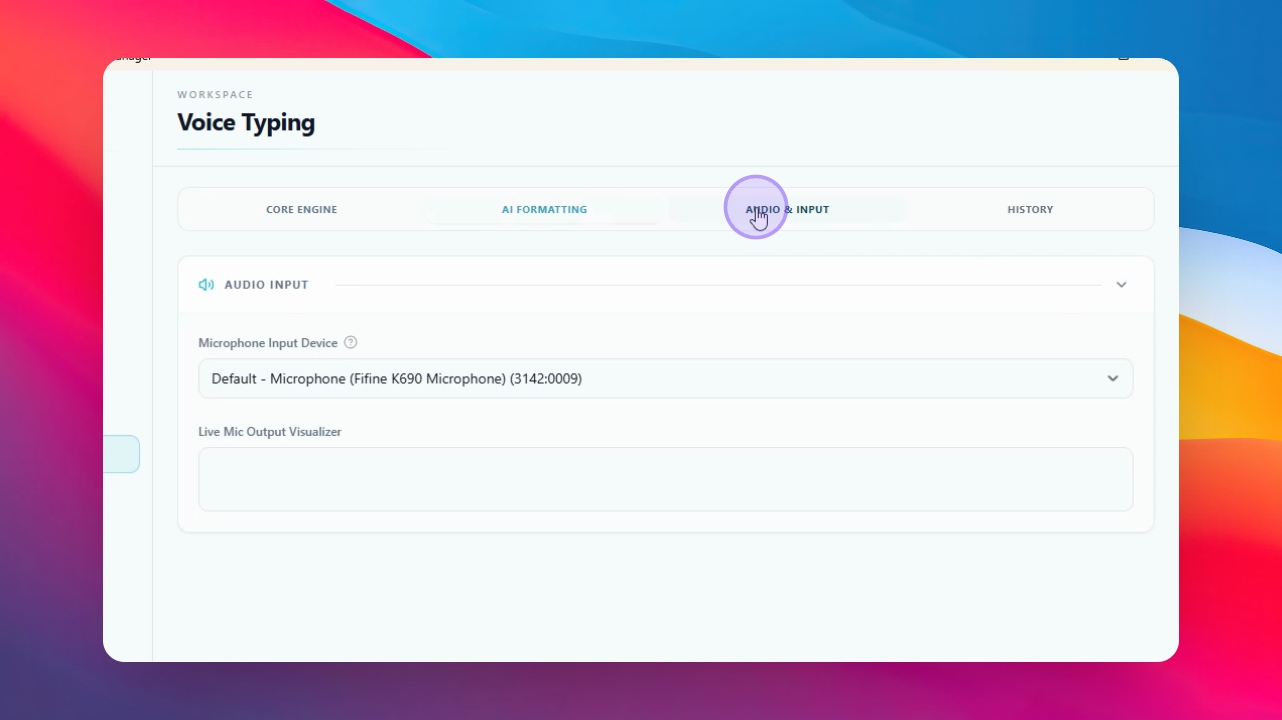
Step 12: Check Audio Input and History
Verify your audio input device (microphone) and review your voice typing history within the app.
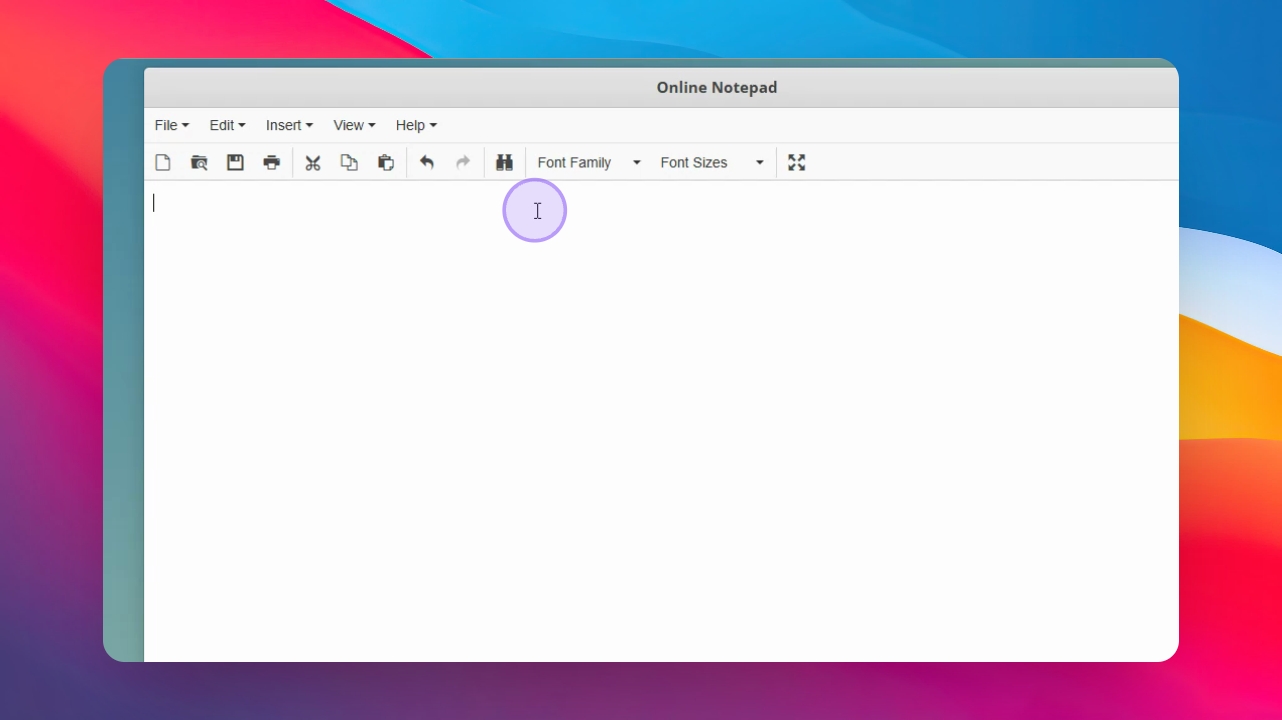
Step 13: Test Voice Typing in Any Text Box
Open any text box (e.g., Notepad), hold your shortcut key, and speak your message. The app will transcribe and insert your speech as text. You can speak in multiple languages, and the app will rewrite accordingly.
Step 14: Test Voice Command and AI Assistant
Try using a voice command to insert a saved snippet (e.g., 'insert social media links'). Test the AI assistant by prompting it to generate content (e.g., 'Write a social media post about InsertKit'). The content will be generated and inserted instantly.
With InsertKit, you can generate and insert content directly without needing to use other AI providers or copy-paste between applications. You can use InsertKit for free and upgrade to a paid plan if you wish. Thank you for following this guide.
